With the completion of Jaybugs granny blankie. I thought I would start a Tuesday tutorial for my squares and the way I border joined them. Part 1 is here - a few tips and beginners readings.
Part 2
I want to give a pictorial of my square pattern I used, please remember this is my first crochet how-to and it may be a little less professional than other online ones....
I used US crochet terms so if you use UK you may find it helpful to look at a crochet stitch conversion chart. If you are new to crochet knowing that there are US and UK terms is something worth knowing - that I didn't know for a few months into my learning to crochet and I couldn't work out why somethings worked and some didn't!
CH - chain stitch
SL - slip stitch
SC - single crochet
DC - double crochet
With a 4mm crochet hook and 8ply yarn:
Start with a slip stitch
ch 4
join with a sl to first ch to make a ring.
(As pictured)
ROUND 1:
ch 3 (counts as first dc), then dc twice into ring (makes 3 dc group as pictured)
ch 3 (makes corner)
3dc into ring, 3ch. 3 times
Join last 3ch to 3rd ch of first 3ch with sl to join the round. (As pictured)
(you will now have 4 groups of 3dc and 4 3ch corners)
ROUND 2:
3ch (counts as first dc) 2dc 3ch 3dc into 3ch corner space.
*3dc 3ch 3dc into 3ch corner space 1ch** repeat from * to ** 2 more times
Join last ch to 3rd ch of first dc with a sl to join round.(as pictured)
ROUND 3:
3ch 2dc 3ch 3dc into 3ch corner space.
1ch 3dc into 1ch space of round 2 (as pictured) 1ch.
*3dc 3ch 3dc in corner space, 1ch, 3dc in 1ch space, 1ch**
Repeat * to ** twice more
Join round with sl to 3rd ch of 1st dc (as pictured)
Here I am going to show you how to change colour.
Remove hook and pull yarn tight through stitch to fasten off. (as pictured)
Take new colour and make a sl
slip sl onto hook (as pictured)
NB. if using one colour just continue from join to 3ch as first dc.
Join with sl to any corner space. (as pictured)
ROUND 4
3ch 2dc 3ch 3dc into corner space, 1ch, 3dc into space, 1ch, 3dc into space 1ch.
*3dc 3ch 3dc into corner space, 1ch, 3dc into space, 1ch, 3dc into space 1 ch**
* to ** repeat twice more
Join round with sl to 3rd ch of 1st dc.
You can make as many rounds as you like by 3dc 3ch 3dc in every corner and 3dc in every 1ch space of previous rounds.
Add 1ch between every corner group of 3dc group of stitches.
i.e. ROUND 5:
3ch 2dc 3ch 3dc into corner, (1ch, 3dc into space) 3 times 1ch.
*3dc 3ch 3dc into corner, ( 1ch, 3dc into space)1ch** * to ** twice more.
Join with sl to first dc.
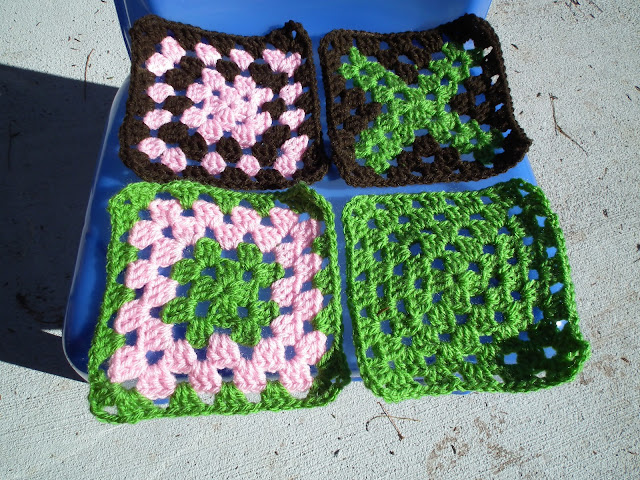
Here are some of the different colour combinations I used to make different patterns.
Happy hooking everyone and please let me know if you have any questions or want some clarification on any of my explanation.
edit: If you are completely new to crochet I have most likely been of no help at all and you will find much more benefit here at Meet me at Mikes.
See you next Tuesday for part 3 - how I border joined my granny squares.


Oh my goodness, this post went completely over my head despite me reading and looking at the photos 3 times! I guess if I had some sort of inkling on how to crochet it might make some sense. But I do love the end result. Beautiful. Well done!
ReplyDelete